Milwaukee has built a reputation for rugged, professional-grade power tools, but their HVAC-specific lineup often flies under the radar for homeowners. That’s a shame, because these tools can turn intimidating climate control tasks, like pulling a vacuum on a mini-split or diagnosing a compressor failure, into manageable weekend projects. Whether you’re installing a ductless heat pump, troubleshooting a refrigerant leak, or just want to stop paying a tech $150 to tell you your capacitor is dead, Milwaukee’s cordless vacuum pumps, digital manifolds, and diagnostic tools bring contractor-level capability to the home workshop without requiring a refrigeration license for every job.
Table of Contents
ToggleKey Takeaways
- Milwaukee HVAC tools share the same battery platform (M12 and M18) as other Milwaukee power tools, eliminating the need for orphaned chargers and making them ideal for homeowners with existing Milwaukee investments.
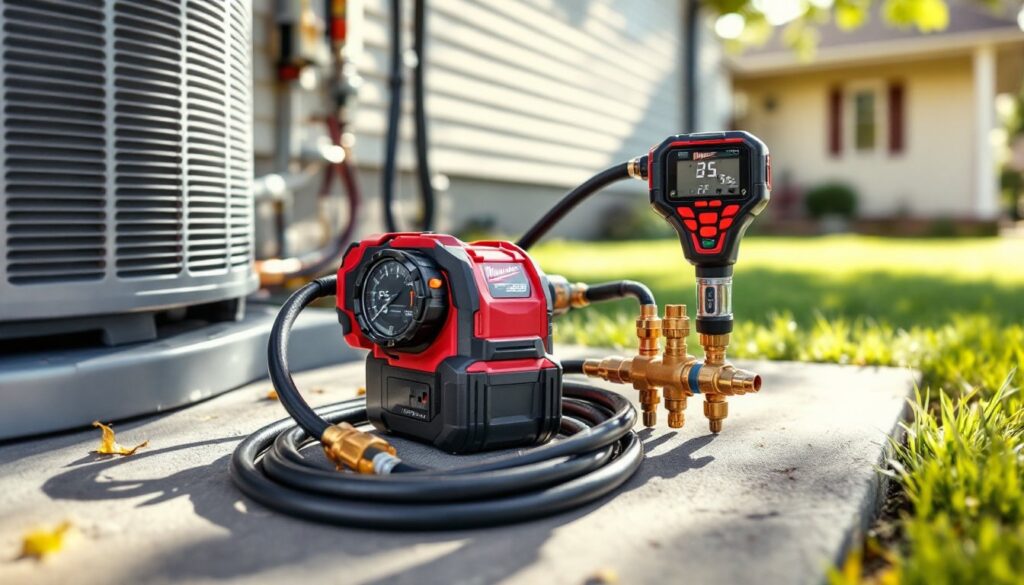
- Cordless vacuum pumps and digital manifolds from Milwaukee bring contractor-level precision to home workshops, enabling DIYers to handle mini-split installations, refrigerant diagnostics, and system maintenance without professional service calls.
- Accurate pressure and temperature readings—especially Milwaukee’s 0.1 PSI resolution with automatic temperature compensation—prevent costly mistakes when working with modern refrigerant systems like R-410A.
- A starter Milwaukee HVAC tool kit should include a vacuum pump, digital manifold, and temperature clamps, which cover 90% of residential climate control projects and cost $400–800 as an initial investment.
- Regular maintenance of Milwaukee HVAC tools—including vacuum pump oil changes, manifold calibration checks, and hose inspections—ensures long-term accuracy and prevents contamination that sabotages system performance.
- Know the legal boundary: pulling a vacuum to prepare refrigerant lines is DIY-legal, but charging refrigerant into a system typically requires EPA Section 608 certification—don’t cross that line without proper licensing.
Why Milwaukee HVAC Tools Stand Out for Homeowners and DIYers
Milwaukee’s entry into the HVAC market wasn’t about slapping their logo on cheap multimeters. They brought the same battery platform, M12 and M18, that already powers drills, impact drivers, and saws in millions of workshops. That interoperability matters. If you’ve already invested in Milwaukee batteries for framing or finish work, your HVAC tools share the same power source. No orphaned chargers, no proprietary packs gathering dust.
The cordless design eliminates the tether to an outlet, which is critical when you’re on a ladder in a cramped attic or crouched behind an outdoor condenser. Trade professionals have embraced these tools because they shave minutes off every service call, but homeowners benefit even more: you’re not racing the clock, so the convenience of going cordless outweighs the slight premium over corded equivalents.
Build quality separates Milwaukee from hardware-store generics. IP54-rated housings on digital manifolds resist dust and water spray, important when you’re kneeling on a wet concrete pad or working near a condensate drain. Rubberized grips and reinforced tool bodies survive the occasional drop off a compressor housing. For DIYers who use these tools a few times a year rather than daily, that durability means the investment lasts decades, not seasons.
Accuracy is where Milwaukee justifies the cost. Their digital manifolds resolve to 0.1 PSI and include automatic temperature compensation, matching the precision of professional field instruments. Cheap manifolds drift out of calibration or display lag that leads to overfilling systems. When you’re working with expensive refrigerants and tight tolerances, especially with modern R-410A systems, that precision prevents costly mistakes.
Essential Milwaukee HVAC Tools Every Home Workshop Needs
Not every homeowner needs a full HVAC arsenal, but a few key tools unlock a range of climate control projects, from mini-split installations to furnace maintenance. Here’s what belongs on the bench.
M12 and M18 Cordless Vacuum Pumps
A vacuum pump is non-negotiable for installing or servicing any refrigerant system. It removes air and moisture from refrigerant lines before charging the system, skip this step, and you risk compressor failure, ice buildup, or reduced cooling capacity. Milwaukee’s M12 vacuum pump pulls down to 50 microns and runs on a compact battery, making it ideal for ductless mini-splits and window AC repairs. The M18 version handles larger residential systems, pulling deeper vacuums faster, critical for multi-zone installations or when you’re working with long line sets.
Both models include automatic shutoff when target vacuum is reached, so you’re not babysitting the gauge. A built-in oil sight glass lets you monitor contamination without draining the reservoir. Professionals recommend changing pump oil after every major job, but DIYers working on their own systems can stretch intervals as long as the oil stays clear. Use vacuum-rated hoses, not standard refrigerant hoses, to prevent air leaks that sabotage the evacuation process. Many workshop tool collections now include HVAC-specific equipment for homeowners tackling climate control upgrades.
Safety note: Pulling a vacuum doesn’t require an EPA Section 608 certification, but charging a system with refrigerant does. Know the legal boundary before you crack open that refrigerant canister.
Digital Manifolds and Temperature Clamps
Mechanical gauge sets are cheap, but they’re also slow, imprecise, and a pain to read in dim crawlspaces. Milwaukee’s digital manifolds display superheat and subcooling calculations in real time, eliminating the mental math and printed charts. You clamp temperature probes to the suction and liquid lines, input the refrigerant type, and the manifold does the rest. For homeowners diagnosing underperforming AC units, this instantly reveals whether the problem is undercharge, dirty coils, or a failing TXV.
The manifolds connect to a smartphone app via Bluetooth, logging pressure and temperature data over time. That’s overkill for a one-off repair, but invaluable if you’re tracking seasonal performance or documenting a warranty claim. The app also stores refrigerant properties for R-22, R-410A, R-32, and other common blends, so you’re not flipping through reference tables.
Temperature clamps deserve their own mention. Milwaukee’s pipe clamps read surface temperatures from -50°F to 302°F with ±1% accuracy, and they stay put without slipping. Cheap clamp-on probes lose contact or read ambient air instead of pipe temperature. When superheat calculations hinge on a few degrees’ difference, that sloppiness leads to misdiagnosis. Pair the clamps with the manifold or use them standalone for furnace flue measurements and duct performance checks.
Other useful additions include a refrigerant leak detector with heated diode sensors (more reliable than UV dye for pinpointing slow leaks) and a non-contact voltage tester for safely confirming power is off before opening electrical panels. Resources like Popular Mechanics frequently review HVAC diagnostic tools for accuracy and ease of use.
Choosing the Right Milwaukee HVAC Tool for Your Project
Buying HVAC tools isn’t about collecting the full catalog, it’s about matching capability to the work you’ll actually do. Here’s how to filter the options.
For mini-split installations: The M12 vacuum pump and a basic digital manifold cover 90% of the process. Mini-splits ship pre-charged, so you’re primarily evacuating the line set and verifying proper vacuum hold. Add a torque wrench (not Milwaukee-specific, but essential) to tighten flare fittings to manufacturer specs, overtightening cracks the brass, undertightening leaks refrigerant. Most line set kits include flare nuts, but verify thread size and use refrigeration-grade wrenches to avoid rounding the soft fittings.
For diagnosing central AC problems: A digital manifold with temperature clamps is the starting point. Pair it with a clamp meter to check compressor and fan motor amperage, most units list rated amps on the data plate, and significant deviation points to failing components. If you’re seeing low suction pressure and high amp draw, suspect a dirty evaporator coil or blocked filter. High head pressure with normal amps often means a clogged condenser or failing fan motor. Guides from Today’s Homeowner walk through systematic HVAC troubleshooting using these metrics.
For furnace and duct work: HVAC goes beyond refrigerant. A combustion analyzer (not in Milwaukee’s lineup, look at UEI or Testo) measures flue gas composition for gas furnaces, ensuring safe, efficient combustion. Milwaukee’s infrared thermometer spots duct leaks and insulation gaps by revealing temperature anomalies. For ductwork installation or modification, a 18V cordless shear cuts sheet metal cleaner than tin snips, and a right-angle drill reaches tight joist bays for strap screws.
For professional or frequent use: Step up to the M18 vacuum pump and the four-port digital manifold. The extra ports allow simultaneous monitoring of suction, discharge, liquid, and auxiliary lines, useful for heat pumps and multi-zone systems. The M18 platform also powers Milwaukee’s cordless reclaim unit, which legally captures refrigerant from systems before disposal (required by EPA regulations for systems containing over 5 pounds of refrigerant).
Budget alternative: If you’re tackling a single mini-split install and don’t own Milwaukee batteries, consider renting a vacuum pump from a tool library or big-box store. Most charge $20–40 per day. Buy the manifold and temperature clamps, they’re useful for ongoing maintenance, and rent the pump. That combination keeps upfront costs under $250 versus $600+ for new equipment.
Tips for Maintaining Your Milwaukee HVAC Equipment
HVAC tools aren’t hammers, they require regular care to maintain accuracy and prevent contamination. Here’s the maintenance schedule professionals follow.
Vacuum pump oil: Change after every 8–12 hours of cumulative run time for deep vacuums (below 500 microns). If the oil looks milky or cloudy in the sight glass, moisture contamination has occurred, change it immediately and re-pull the vacuum. Use only vacuum pump oil, not motor oil or compressor oil. The wrong viscosity allows air leaks and increases ultimate vacuum pressure. Expect to pay $15–20 per quart: a typical oil change uses 6–8 ounces.
Manifold calibration: Digital manifolds drift over time, especially after temperature extremes or rough handling. Most Milwaukee units include a zero-adjust function, with hoses disconnected and valves open to atmosphere, run the calibration routine per the manual. For absolute verification, compare readings against a deadweight tester or certified reference gauge annually. If deviation exceeds ±0.5 PSI, contact Milwaukee service for recalibration or replacement.
Hose and fitting inspection: Refrigerant hoses degrade from UV exposure and ozone. Store them coiled indoors, not in a hot truck bed. Before each use, check for cracks, kinks, or damaged fittings. A pinhole leak in a vacuum hose prevents reaching target microns, wasting hours of troubleshooting. Replace hoses showing any damage, they’re $20–30 each, cheap compared to a failed install. Techniques covered by Family Handyman emphasize routine equipment checks for reliable project outcomes.
Battery care: Milwaukee’s Lithium-ion batteries tolerate partial discharge better than older chemistries, but long-term storage at full or zero charge degrades capacity. For tools used seasonally, store batteries at 30–50% charge in a cool, dry location. If a battery sits unused for over six months, top it off to 50% to prevent deep discharge lockout.
Sensor cleaning: Temperature clamp sensors accumulate oil, dirt, and oxidation that insulate them from true pipe temperature. Wipe sensors with isopropyl alcohol and a lint-free cloth after each use. Don’t use abrasive pads, they scratch the sensor surface and slow thermal response.
Case storage: Foam-lined cases aren’t just for looks, they prevent impact damage during transport and keep dust out of sensitive electronics. Always return tools to their cases, even in the workshop. Vacuum pumps are especially vulnerable to debris entering the intake port when left uncovered.
Conclusion
Milwaukee HVAC tools bring contractor-grade performance to home workshops, making climate control projects less intimidating and more affordable over the long run. The upfront investment is real, expect $400–800 for a starter kit, but so are the savings when you’re not calling a tech for every refrigerant top-off or mini-split install. Focus on the core tools (vacuum pump, digital manifold, temperature clamps), maintain them properly, and you’ll handle most residential HVAC work with confidence. Just remember: pulling a vacuum is legal: charging refrigerant usually isn’t without certification. Know where DIY ends and the pros take over.